Timber Framing day 2
In my last blog post (Timber Framing day 1) I talked about the project we are working over this semester at my college.
Today I wanna talk a bit about the tools we use and the process. Please remember while you read this that I am still learning so please go easy on me if I quote something wrong, besides that I hope you guys enjoy the pictures and explanations :)
The first thing to know is that Traditional Timber Framing uses Mortise and Tenon joinery that are than pinned together so the joint does NOT come apart on its own. Traditional timber Framing uses no nails, the frame is staying together only because of tight joinery and a good design.
In order to make nice and smooths cuts you have to have a nice sharp chisel and a chisel that is big enough to work on big timbers, if you would work with a regular chisel on a timber you would spend weeks on a cut.
We used 2 types of chisels, the normal Timber Framing chisels and the Slick chisels. The difference between the two is simple; the Slick Chisel is much bigger and you dont use a mallet (Mallet is a type of hammer) on it, the timber frame chisel is smaller and you can use a mallet on it.


 Like I said having a sharp Chisel makes a huge difference performance and time wise! On the left picture I am cleaning up my mortise that I made with my Chain mortiser.


There is many ways you can cut different parts for the framing, We got to try all of them.


I will try to explain the square rule my self as best as possible:The Term "Square Rule was Coined to Edward Shawn in the 1830s in one of his books. Its based on the idea that within every irregular, rough sawn timber lies a slightly smaller perfect timber. All joinery is cut to this inner timber, which usually shares two adjacent square faces.
This way it does not matter if all the timbers are different, you have two lay out faces that you measure from to do your layout.
The steps for laying out are easy:
1. Make sure your primary face is flat, than make sure that your secondary face is flat as well and square to your primary face.
2. Layout all your joinery from your primary face / Layout face.
3. Draw your joinery on all surfaces including the other non layout faces.
4. Cut according to your layout and hope it is all right!
Here I laid out my Step lapped mortise for my Rafters on my plate.

Using a jig that helps me a 45 Degree angle I start Chiseling my way trough the wood.

By the end this is what it should be looking like. The rafter will be sitting on there, it will be nice and strong.

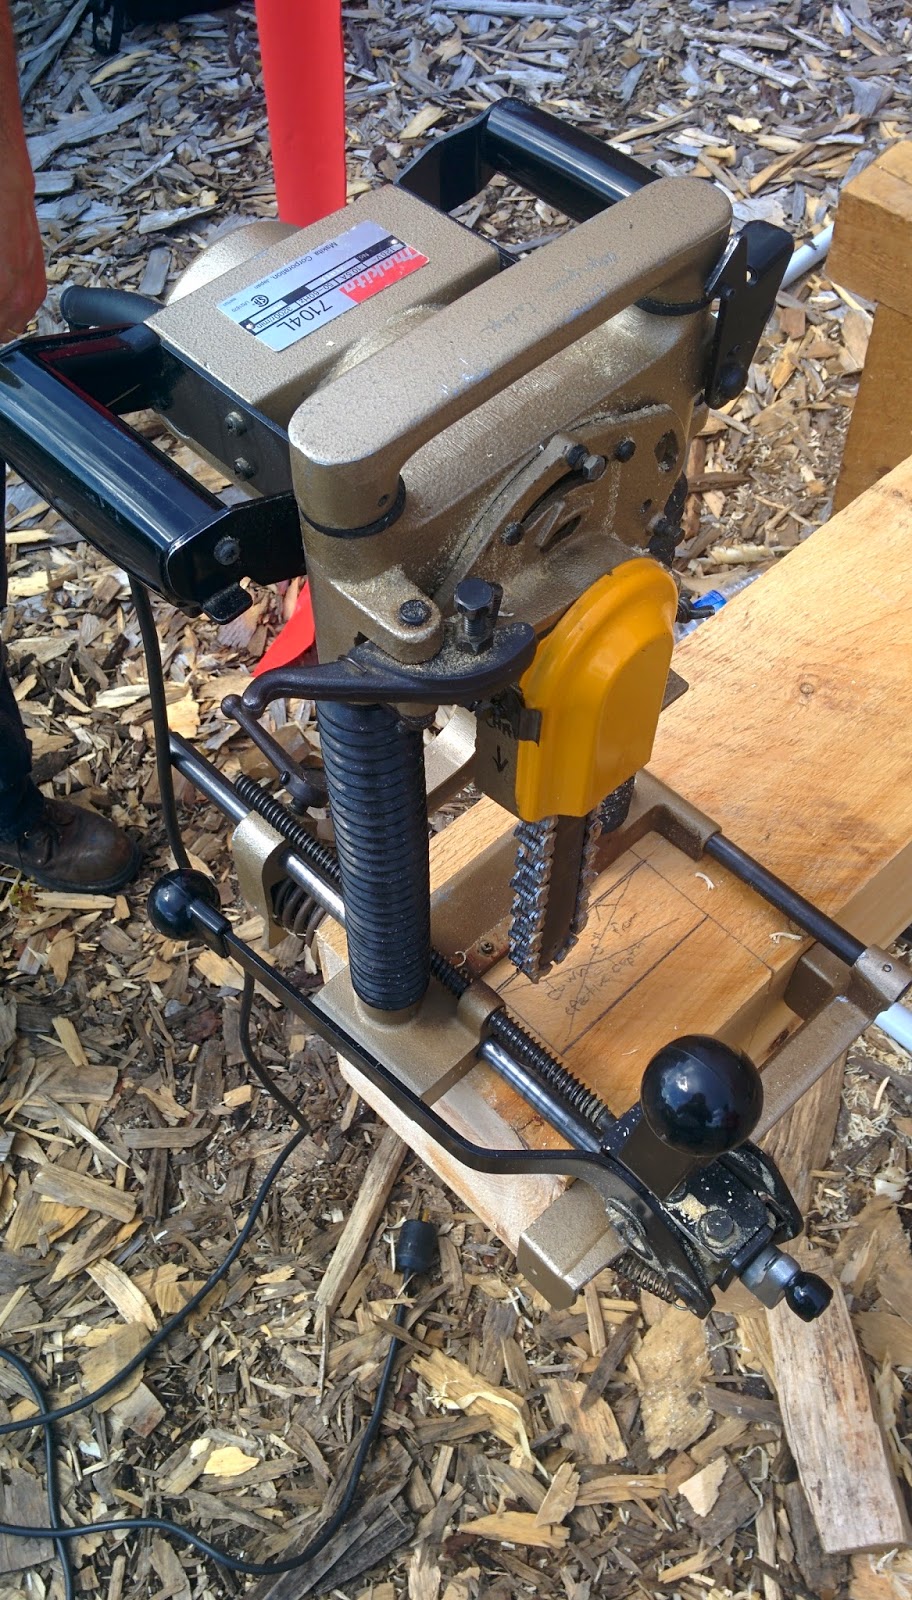
Using a chain mortiser you can cut a Mortise in a a couple of minutes. Have your layout ready, set up your Chain mortiser by placing it on and locking it in place, set it to the right depth and than start drilling /cutting!


No comments:
Post a Comment